How to transfer my WordPress website?
When relocating a website, you have to take a few things into account. Your website consists of a number of elements that can be reached as the website thanks to your domain name. If you only transfer the domain, the website does not go along with it, if you want to do this you also have to move the files and the database. In this article we discuss how you can do this with a WordPress website.
Also read: Move service - Website transfer
WordPress.com and WordPress.org
The first thing you might encounter is the difference between WordPress.com and WordPress.org. Without making it very complicated, the difference between the two is pretty simple:
- WordPress.com: Is hosted by the creators of WordPress itself, no installation is required and there is no access to the databases nor the files. It's WordPress as simple as possible.
- WordPress.org: Is not hosted by the creators of WordPress but at a host of your choice, this is also called Self-hosted WordPress. The installation of this has been done manually and in general there is access to the databases and files.
If your website is hosted by a Web hosting party, ie WordPress.org, then only access to the files and databases is required to be able to transfer your website 1 on 1. We'll explain how you can do this later in this article.
If your website is currently with WordPress.com, this means that moving your website is extremely difficult. After all, access to the database and files are required to be able to transfer everything properly 1 on 1. It is possible to export your website texts and import it into a .org installation, but you have to completely redesign your layout (theme) and more.
Note: We do not discuss the relocation of WordPress.com websites in this article, because WordPress.com does not allow installation of third-party plugins.
Duplicator

Duplicator - WordPress Migration Plugin, also called Duplicator is a WordPress plugin aimed at moving your WordPress website to another server or account. With this plugin you can transfer your entire WordPress website including the management panel to your cPanel account at Neostrada but also to another hosting. Required for this is access to the management panel of your current WordPress website to install and set up the plugin. The plugin will scan your website and pack everything together to transfer to the new location.
A small number of functions of Duplicator are:
- Move, migrate or clone a WordPress site between domains or hosts without downtime
- Convert a live site to your localhost for development
- Transfer a WordPress website from one host to another
- Back up a WordPress website or parts of a site manually
- Duplicate a live site to a staging environment or vice versa
- Bundle an entire WordPress site for easy reuse to other domains or websites
- Perform a full WordPress migration without struggling with sql scripts for import / export
To use Duplicator, we recommend the QuickStart manual Duplicator from the creators of the plugin, which explains in detail how to move your website.
Transfer manually
For manual transfers you need access to the file management or the FTP of your current host of your website. You also need access to the databases or at least have the ability to export them. How you can do this differs per host, so it's best to check this with your current hosting provider. You also need access to the files and databases at the Neostrada server. In the steps below we explain how you can transfer everything step by step.
Keep in mind that making changes to your old host is entirely your own responsibility. We do not give support on the manual transfering of your website, we've have described the steps as extensively as possible. In the event that you cannot resolve it yourself, you can also use our move service.
Steps for exporting your website
Caution! Because it differs per host how you can access the databases and files, we describe the following steps with cPanel. It is best to ask your current host which interface is used and how it works, especially if this differs from the cPanel method we describe here.
Step 1) Log in to cPanel and click on File manager under the Files category.
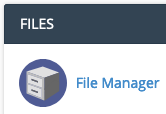
Step 2) Navigate to the document root, where the files of your WordPress installation are located, with cPanel this is the public_html for the primairy domain. Double click on this to open it.

Step 3) Click Settings at the top right of the taskbar, and then check the box for Show hidden files (dotfiles) if it is not already enabled and click Save.
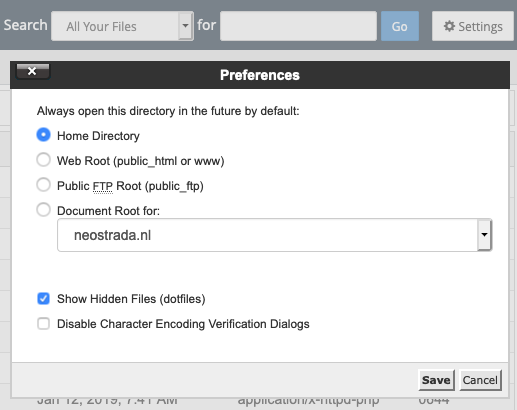
Step 4) Select all files and click Compress on the top right of the taskbar.
![]()
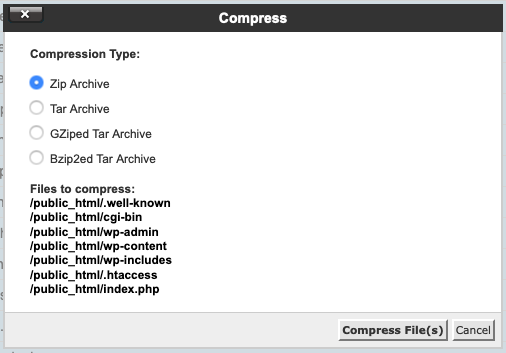
Step 5) At the screen that now opens, select Zip archive followed by the Compress File(s) button, the server will now put all files in 1 large .zip archive. You can specify a different file name at the bottom of the screen before you start compressing.
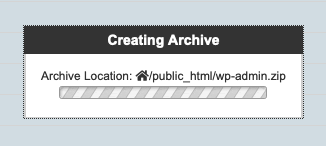
Step 6) Select the newly created zip file, in this example this is wp-admin.zip, and click Download. Download the file to a folder on your computer you can easily find later.
![]()
Step 7) You'll find the wp-config.php among the files you've downloaded. Here you will find a number of lines that look something like this:
/** The name of the database for WordPress */define('DB_NAME', 'example_wordpress');
/** MySQL database username */define('DB_USER', 'example_wordpress');
/** MySQL database password */define('DB_PASSWORD', 'example123');
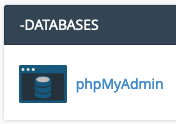
Step 8) Go to the home screen in cPanel and click on phpMyAdmin.
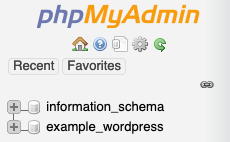
Step 9) In the left column of phpMyAdmin, select the database that has the same name as the one from your wp-config.php. In the example above, the database is called example_wordpress.
Step 10) Now that you have selected the database, click the Export button at the top of the screen.
![]()
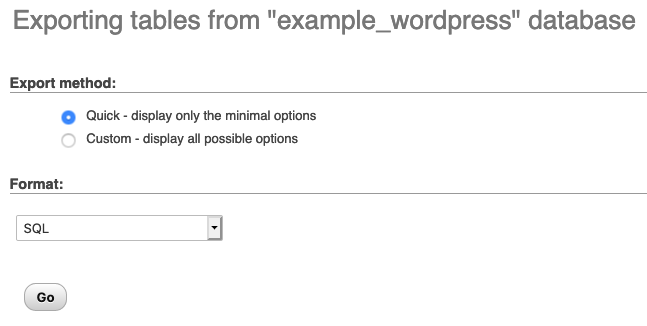
Step 11) Export the database as a .sql file with the Quick export method. Save the file on your computer and save it in a folder where you can easily find the file later.
Step 12) Congratulations! You now have the files and databases stored locally on your computer and are ready to upload the website to the new location.
Steps for importing the files
When you have collected all the files and the database of your current host and saved them locally, you can start uploading it to the new server. We will upload the files in the steps below via the file manager in cPanel, this works best if you have the files in a zip archive. Of course you can also perform these steps via FTP if you prefer. If the .zip file is too large for uploading in File Manager, a solution is also to use FTP.
Also read: How do I log in via FTP with FileZilla?
Step 1) Log in to cPanel and click File manager under the Files category.

Step 2) Navigate to the folder where the files of your WordPress installation are located, with cPanel this is the public_html folder for the primairy domain. Double click on this to open it. If it concerns an Addon domain, then you should not open the public_html but the corresponding document root of this addon domain.

Step 3) Click the Upload button on the top right of the taskbar.
![]()
Step 4) You'll now see the upload screen. Here, select the zip archive that you previously downloaded from your previous host. You can also drag this from the file manager on your computer to this screen (drag & drop). It may take a while before your file is uploaded.


Step 5) After the upload is complete, you can close this window and return to the file manager. Here you select the uploaded zip archive and click Extract on the top right of the taskbar.
![]()
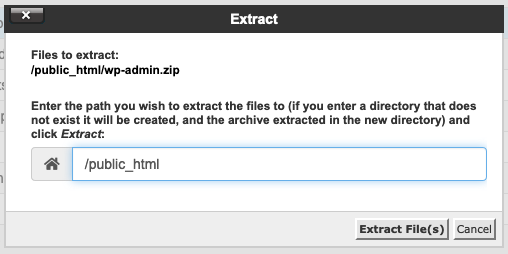
Step 6) You'll now get the options screen for extracting (extracting) the zip archive, because you have already placed the file in the correct folder, you can leave the path for what it is and click Extract File(s).
Step 7) Select the file wp-config.php from the just extracted files, this file contains the basic configuration of the website, including which database to use.

Step 8) Now click Edit in the top right of the taskbar to open the wp-config.php in the file manager of the file manager.
![]()
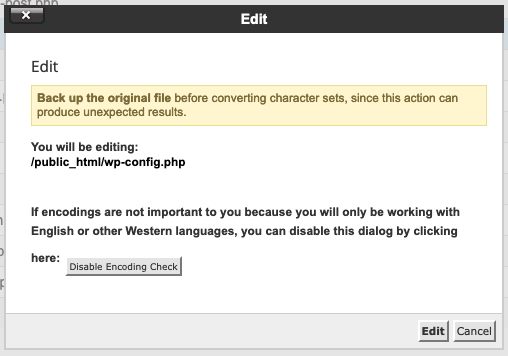
Step 9) You will first receive a message about encoding, which you can ignore by clicking Edit.
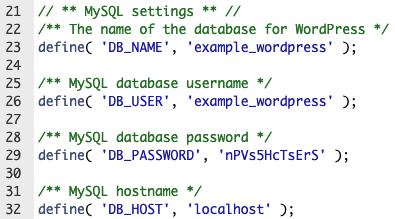
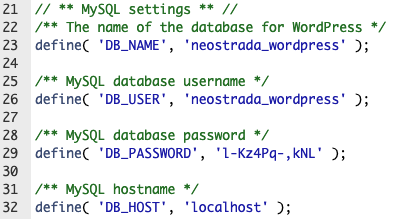
Step 10) Now look for the part that is about the database, database user, database password and the hostname.
Step 11) Leave this screen open and go back in the other tab to the main overview in cPanel where all functions can be seen (the screen that you see when you log in). Click MySQL® databases.

Step 12) At the top of the page you can create a new database, enter a database name that does not yet exist and click Create Database. In this example we call the database neostrada_wordpress, in this example the user neostrada is the cPanel username and is therefore always part of the database name. After creating the database you will be notified that it has succeeded and you can return to the MySQL databases page.

Step 13) Go to the MySQL user section where you can add a new user. Enter a name for the username, the same principle as for the database. For convenience we use the same name for the user as we did with the database.
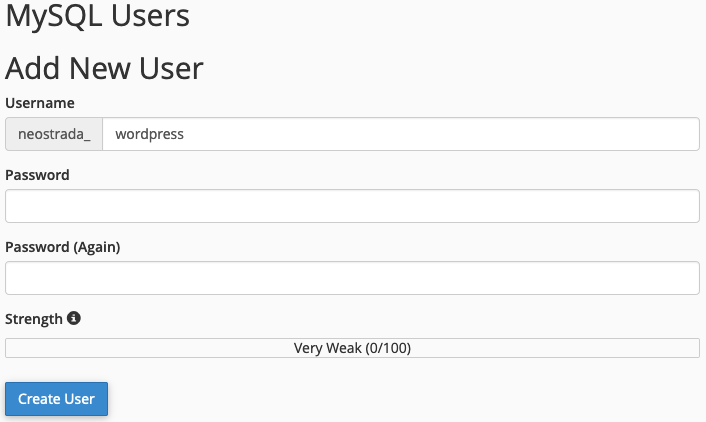
Step 14) Now click the Password Generator button to create a secure password for the database user.
![]()
Step 15) Generate a random password and copy it to a safe place. After that place a checkmark at I have copied this password to a safe place and click Use password.
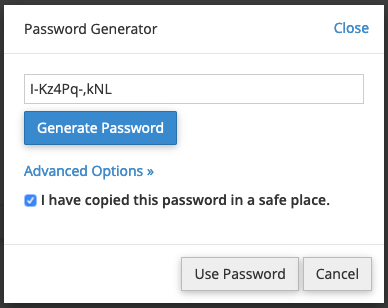
Step 16) The password is automatically entered for you, click Create user.
![]()
Step 17) Now that the user has been created, we will link it to the database so that your website can access the data in your database via the user. Select the newly created user and database and click Add.

Step 18) To give the user access to the database you need these the correct permissions, for WordPress you assign all permissions and click Make changes to apply this.
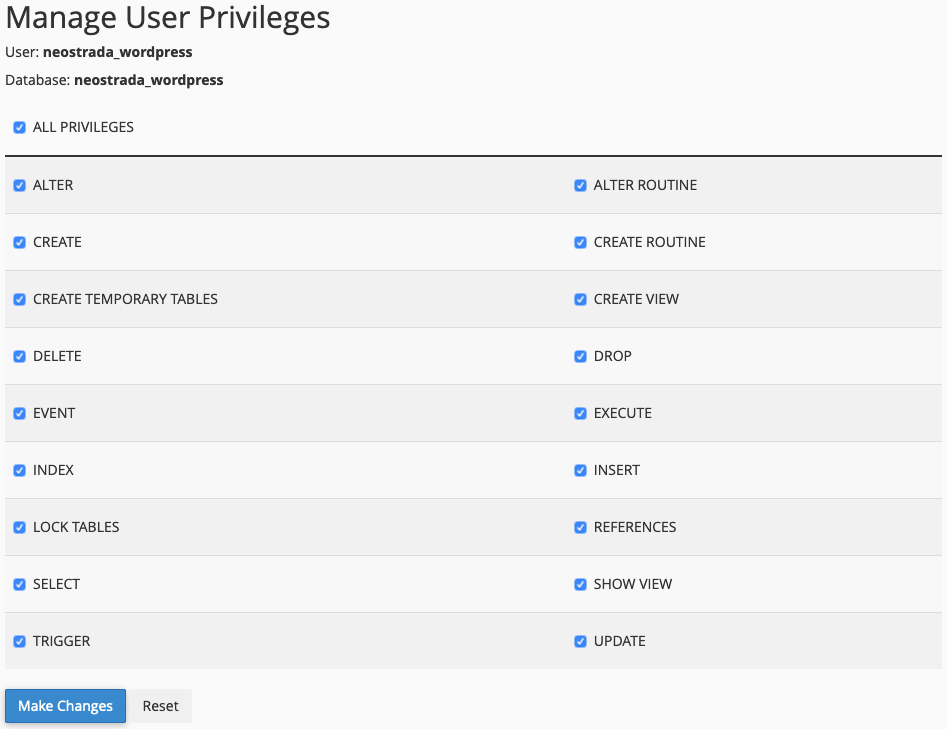
Step 19) Now go to the tab where you have the wp-config.php text editor open. Change the database name, user and password to the data that you created in MySQL databases in the previous steps and click Save changes.
![]()
Steps importing - The database
When you have transferred all files to the new server you can start importing the database export. This is the .sql file that you exported with the old host. Prior to this step-by-step plan, we have already made the necessary preparations for the previous steps. If you have not completed the step-by-step plan for importing the files, we recommend that you first complete steps 11 to 18 before proceeding with this step-by-step plan for the database.
Note: If your exported database is larger than 50MiB, it will not be possible to import it via the steps below. A solution for this problem is to use SSH to upload the database.
Also read: How do I upload a database with SSH?
Step 1) Log in to cPanel and click phpMyAdmin.

Step 2) Select the database in the left column of phpMyAdmin that has the same name as the one from your wp-config.php. In the example above, the database is called neostrada_wordpress.
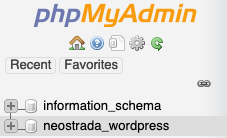
Step 3) Now that you have selected the database, click the Import button at the top of the screen.
![]()
Step 4) In the Import to database overview click on Browse and select your .sql database file on your computer. Leave the setting on the default values and click on Start, depending on the size it may take a while before the import is complete.
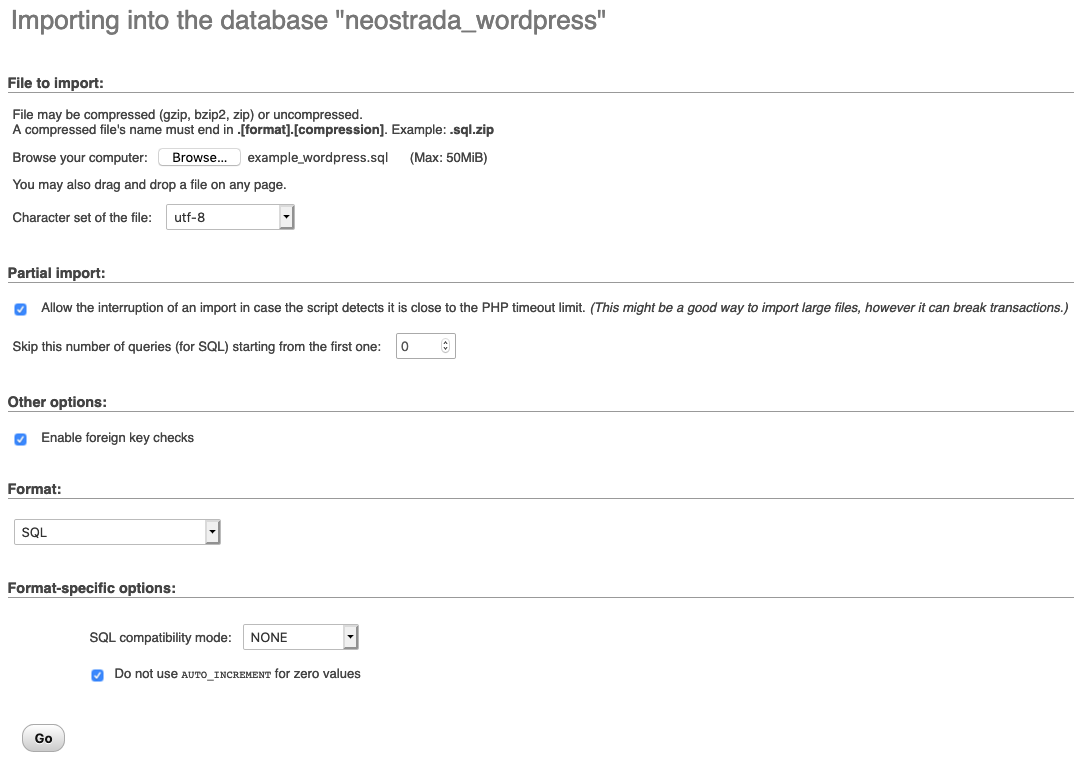
Step 5) Congratulations, you have now successfully imported the database. When you have followed all the steps, moving your website is now complete! You can optionally change your hosts file to check what the website looks like on the new server and if everything is okay.
Also read: How do I customize my hosts file?


