How do I set up DKIM?
With DKIM (DomainKeys Identified Mail), every email you send is signed with a digital signature. This signature is used to prove that you are the sender of the email. For example, spam filters can see if an email is sent by the correct user, or if someone or something is using your domain to send spam. In this article we explain how to set DKIM.
Note: Each domain has it's own unique DKIM key.
Steps
Step 1. Log in to cPanel.
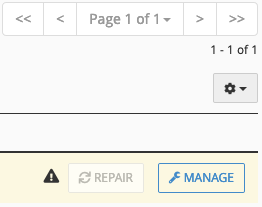
Step 2. Click on Email Deliverability under the Email category. On the next page you can see all domains with DKIM within your package, choose the correct domain and click on the corresponding Manage button. You will only need to do this for the top-level domain, any subdomains under this top-level domain will automatically use the DKIM record of the top-level domain.

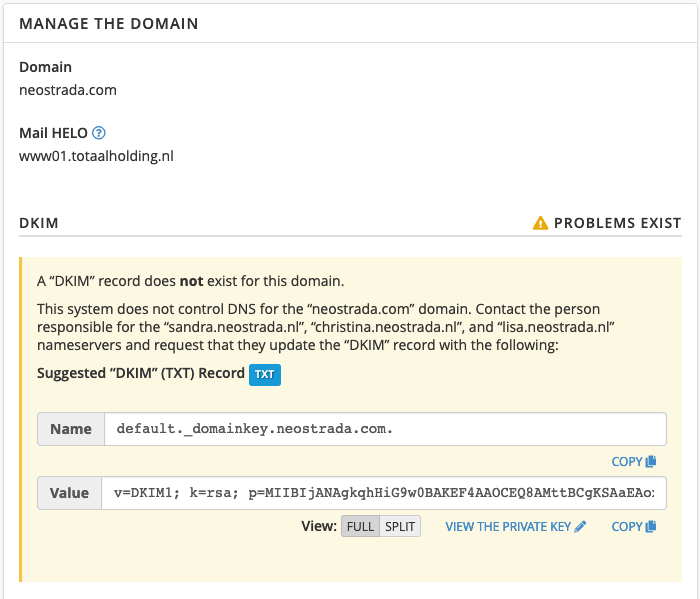
Step 3. You will now see the DKIM record to be added consisting of 2 fields that need to be inserted into the DNS, for the moment we'll keep this page open and continue with the next step.
Important: If your DNS runs through the nameservers of Neostrada use the standard view: Full. This view creates a record value consisting of a whole value so our DNS will recognize it.
If your DNS is hosted externally ask them which format is required, most host use Full as well. If your host requires the DKIM to be split into 2 sections choose Split instead and follow their steps.

Step 4. Go to neostrada.com in a new tab or screen and login into your customer account. In your account go to the DNS management of the domain name, also read How do I manage my DNS records? Here you add the following record:
- Name. Here you paste the subdomain from the Name field from the overview of the previous step: default._domainkey
- Type. Here you select TXT.
- Content. Here you paste the contents of the Value field from the overview of the previous step.
Important: There is currently a different interpretation of the DKIM record in cPanel. At the very end of the record of the Value field (Content) there is a semicolon, in our DNS you have to place a backslash just in front of this semicolon. Your record does not end with ; but with: \;
If you retrieve the DKIM from a Cloud server in WHM at Edit DNS Zone, keep in mind that there is a space and " character in the middle of the record which both should be removed. Otherwise you will not use the Full view version of the record which is required in the Neostrada DNS.

Also read: How do I manage my DNS records?
Step 5. In the DNS Management click on the green check mark to save the DNS record. Within about 2 hours the changes will be processed by all systems within Europe.
Note: cPanel does not manage the DNS and uses a different format compared to the customer account DNS management. This makes the warning or error message about the SPF and DKIM irrelevant, you can ignore the message. To test whether the DKIM and SPF are set up correctly, you can test an email via for example mail-tester.com.


